Thanks for returning for the final part of “How to Make a D&D World Map: A Non-Artist’s Guide”! The rough sketch we’ve been working on so far will be transformed into a timeless piece of art (or something like that…) thanks to the wonderful magic of computers.
How to Make a D&D World Map: A Non-Artist’s Guide
Part 1: Introduction & The Lay of the Land
Part 2: Civilizations & Regions
Part 3: Roads, Transportation, & Unique Features
Part 4: From Paper to PDF (you are here)
- Getting Started
- Land and Water
- Terrain Features
- Cities and Paths
- Names and Features
How to Make a D&D World Map: From Paper to PDF
Getting Started
In the rest of this tutorial I’ll be using Photoshop CS3, but you could get the job done in any image editing program (GIMP is a great free alternative!). The most important thing you’ll need is the ability to work with layers.
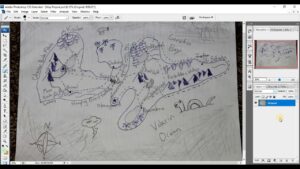
First, you’ll need to somehow get a digital version of your paper drawing. Ideally, you have access to a scanner and can just scan a copy. I know I don’t have a scanner though, so I ended up just taking the highest quality picture that I could. Try to preserve as much detail as possible.
Got it? Great. Now go ahead and create a new file (Ctrl + N) in photoshop. For the size, I ended up using the dimensions of my camera’s image (4272px X 2848px). This proved to be sufficient for the level of detail that I wanted, but remember: the bigger your file, the more detail you can include.
Land and Water
Next, create a new layer (Ctrl + Shift + N) and rename it to “Land Outlines” or something along those lines.
On this layer, trace the outline of your masses of land with the Brush tool (B). My brush settings were pretty straightforward: 15 px, 100% hardness, 100% opacity, 100% flow. For the color, I just used black.
After this, go ahead and trace the outline of your lakes on the same layer.
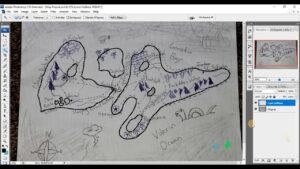
Next, create a new layer titled “Water”. Get the Paint Bucket tool (G), and fill in the water layer with a light blue color. I decided that I wanted to add a little bit of texture to the water on my map. It’s a subtle little touch that gives the map a bit of depth.
Right-click on the “Water” layer and go to Layer Style (you can also get to this menu by double clicking on the layer itself). Under the Bevel and Emboss section, click the box for Texture. Mess around with the different presets and settings until you get something that resembles waves and ripples in the ocean. For my map I used the third preset within the Greyscale Paper library, 666 scale and 100 depth.
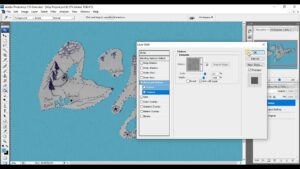
For the next step, go ahead and grab the Magic Wand tool (W), and – on the Land Outlines layer – select all of the areas inside of the landmass. Hold down Shift while clicking to select multiple separate items.
Create a new layer named Land Fill, and – using the Paint Bucket tool – fill in the selected areas with an earthy color (I went with light green).
On this new layer, go to the Layer Styles panel. This time around, we’ll be applying a Stroke to the layer. Essentially this takes anything on the layer and draws an outline around it. My stroke size was 7, and everything else was left at the default value.
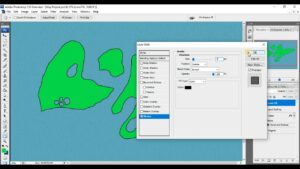
The main benefit to this method is the ability to quickly and easily add/remove portions of the landmass – while retaining the outline. If you want to add in more land, just draw it in with the Brush tool. If you want less land, simply use the Eraser (E). Let’s practice this technique by “adding” in some rivers.
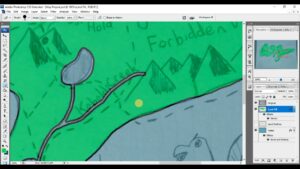
With the Eraser tool (size 20px) on the Land Fill layer, trace each of your rivers into existence. You may need to change the size of your eraser tool (this can be achieved by using the brackets [ ] on your keyboard) to an appropriate size for each of your rivers. For this step, you may find it useful to overlay your Original layer with a decreased Opacity. This allows you to actually see what-the-fuck you’re doing.
Terrain Features
Heck yeah! With all of that done, we can now move on to adding in the major terrain features of our map. From the previous articles, this primarily consists of forests, hills, desert, and mountains.
This entire section is essentially the same 3 things repeated over and over again:
- Using the Brush tool (B) ~10px, trace the outline of the terrain feature
- Fill in the primary color, as well as the secondary color(s) with the Brush tool (~5-30px)
- Duplicate the layer (Ctrl + J) and place it appropriately on the map. You may want to rotate or resize the duplicates (Free Transform = Ctrl + T). When you’re all set go ahead and select all of the layers, right-click and select “Merge Layers”.
I’ll give a few progress images for each subsection here, but if you want a better idea of the entire process be sure to check out the video here!
Mountains
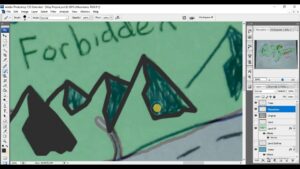
Take the good ole Brush tool, and trace the outline and shaded portion of your mountains with a dark grey. After that, carefully fill in the un-shaded portion with a lighter grey.
If you’re able to, Duplicate the layer (Ctrl + J) and move it around to fit in with some of the other mountain ranges on your world map.
Forests
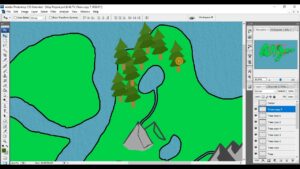
Here’s an example of what your pine tree forests might look like.
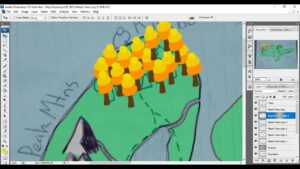
Here’s what your “unmerged” maple tree layers may look like. Repeat this process for as many different forests and tree types you have on your map!
Deserts
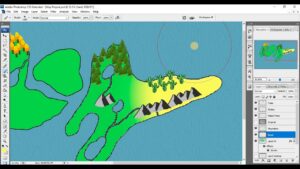
With my desert layer, I repeated the same process to get some cacti – though I didn’t really like how they turned out and I deleted them. The more important feature I’m adding here is the yellow color to represent sand.
- Make a new layer and place it above the land but below any terrain features
- With the brush tool chosen, select a brush with a feathered edge and make the size huuugeee
- Color in any regions that you want to be ‘sand’ with a nice yellow color. The feathered edge will help blend it with the primary land color
Hills
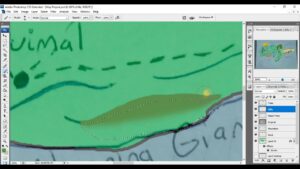
To create hills, the process begins similarly to the others. Trace the outline with the brush tool and fill in the color. Next, grab the Lasso tool (L) and start wranglin’.
Of course, by wranglin’ I mean select the bottom half of your hill as well as some of the “grass underneath the hill”. Next, use a feathered brush – just like with the sand – to create a blended area between the hill and the land. I had to touch up a few spots with the eraser to make mine look like hills and not skateboard ramps.
Cities and Paths
With the land starting to take shape nice, it’s now time to add in some specks of civilizations. To do this, we’re going to be using the – wait for it…. – brush tool! You should be pretty well versed by this point so I’ll get right to it: dark grey, 30px.
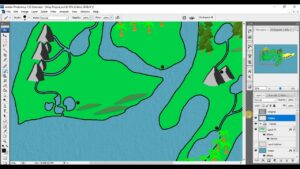
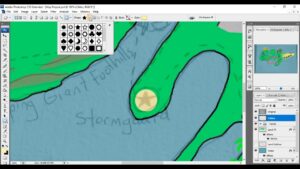
Adding in the capitols takes a little bit more work, but the process is pretty straightforward. Go ahead and smash (B) on your keyboard, and make the size ~100px. For the circular portion I chose an “off-white” color (that reminded me of Easter yellow). Place a single one of these on a new layer at one of your capitols.
Next, we’re going to add in the stars by using the Custom Shape Tool (U). In the ‘Shape’ dropdown menu, select the solid-filled star. If you don’t see this option, you may have to load a different library by clicking the little right-pointing arrow in the ‘shape’ dropdown menu. With the same dark grey used for cities, draw a star on top of your large white-ish circle. The placement might not be perfect, but you can use the Move Tool (V) to adjust placement or Free Transform if you need to resize or want to rotate.
After that, just Merge/Merge Down the star layer with the circle layer and duplicate it for as many capitols as you have within your D&D world.
Just like in Part 3 of this guide the next step is to connect these cities.
With the brush tool selected pick an appropriate size and color. In order to get the effect of a dashed line, we are going to be messing around with the brush settings a bit. This little icon – which looks like a cup with paint brushes in it – can be found on the right side of your screen. If you’re using a different workspace, you can get to this screen by going to Window -> Brushes.
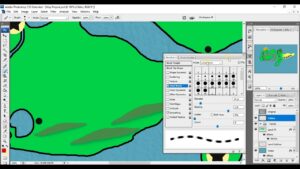
Click on Dual Brush and play with the settings until you are happy with the preview.
I was quite pleased with the following settings:
- Diameter = 15
- Spacing = 175
- Scatter = 0
- Count = 8
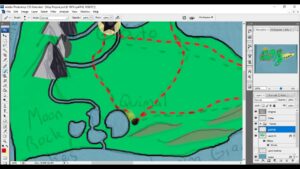
At this point, all you have to do is draw the different roads and trade routes on your map. At intersections or cities, you may need to manually touch-up a few areas where paths cross to make it look ‘cleaner’.
Names and Features
One of the final, and most satisfying, steps is getting to add in the different names of cities and regions. Starting off, we’ll be using the Text tool (T).
The font I ended up using is called “Gabriola” and is included with Photoshop. Don’t feel like you need to stick to this one though! There are plenty of really cool options. The most important thing is that it must be easily readable. I don’t care how cool or fancy-looking a certain font is; at the end of the day I need to be able to actually read it.
The names of cities were written largely in white with a black/dark grey outline (using Stroke in Layer Styles). The names for different regions were written a bit smaller, and in dark grey.
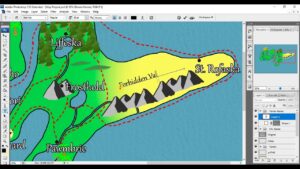
You may want to have a few items on your map named at angles, or along a curve (such as a river). This can be achieved by using the Pen tool (P).
If you want a straight line, just click two separate spots and a line will be drawn between them. If you want curved lines, after adding in a new section keep the mouse button held down. From here you’ll be able to “bend” the line that you just created. It might take a little bit of practice using this tool, but once you get the hang of it it’s super easy.
After adding in the lines that you want, go back to the Text tool. When the mouse cursor hovers over the lines that you’ve drawn, you’ll notice it changes to a different symbol. Once this happens, click on the line and begin typing. Your text will follow perfectly along the line, even if it’s curved.
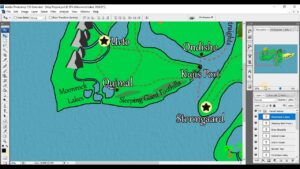
It’s a lot easier to fit in more, and smaller, names when using a computer so feel free to add in additional names for places. I could have spent a lot more time naming each of the oceans, rivers, lakes, and forests on this world map.
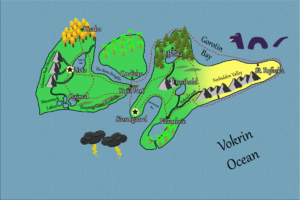
The final step is to add in any unique features on your map! I don’t have any great advice for this section. I just ended up using the Brush tool and tried my best to draw the things I wanted. Admittedly, it was during this step that my non-artistic skills shone like a lighthouse during a storm. If you don’t like how things end up looking, you can always take them away later.

FREE 5 day email course
Be sure to join the email list and sign up for the FREE 5-day email course centered on running your very own homebrew campaign! You'll learn everything you need to get started, from designing a story arc to reacting to (unexpected) player choices.
D&D 5e Crash Course: Exhaustion
Switch up the challenge for your players with levels of...
Read MoreRunning Tomb of Annihilation: 1 Year Review
After running tomb of annihilation for a year, here's the...
Read MoreHow to Make a DnD Dice Box from an Old Book
Want to store your dice in an arcane tome? Well...
Read More

